As the clock strikes midnight on New Year’s Eve, you want to make a statement with your nail game. Whether you’re heading to a party or just want to ring in the new year in style, these 15 glittering nail designs are sure to sparkle and shine. From classic glitters to intricate art, we’ve got the inspiration you need to take your nail art to the next level.

New Year’s Eve Nail Art Trends
This year’s nail art trends for New Year’s Eve are all about sparkle, shine, and making a statement. From metallic glitters to holographic finishes, we’ve seen it all. But, if you’re looking for something a little more unique, why not try one of these 15 glittering nail designs that are sure to impress?
1. Glitter Bomb Nails
Get ready to shine with these glitter bomb nails that are sure to turn heads. This design features a base coat of clear polish, followed by a layer of glitter polish, and finished off with a top coat of clear polish. The result is a nail that’s covered in a thick layer of sparkly glitter that’s perfect for New Year’s Eve.
Glitter Bomb Nail Tutorial:
For this design, you’ll need a clear base coat, a glitter polish, and a clear top coat. Start by applying a base coat to each nail, followed by a layer of glitter polish. Finish off with a top coat of clear polish and voila! You’ve got a glitter bomb nail that’s sure to shine.
2. Holographic Nails
Take your nail art to the next level with these holographic nails that feature a holographic finish. This design is perfect for those who want a nail that shines and sparkles without being too over-the-top. Simply apply a holographic polish to each nail and finish off with a top coat of clear polish.
Holographic Nail Tutorial:
For this design, you’ll need a holographic polish and a clear top coat. Start by applying a base coat to each nail, followed by a layer of holographic polish. Finish off with a top coat of clear polish and you’ve got a holographic nail that’s sure to shine.
3. Glitter Ombre Nails
Get creative with this glitter ombre nail design that features a gradient of glitter polish. This design is perfect for those who want a nail that’s a little more unique and eye-catching. Simply apply a layer of glitter polish to each nail, gradating from light to dark.
Glitter Ombre Nail Tutorial:
For this design, you’ll need a clear base coat, a glitter polish, and a clear top coat. Start by applying a base coat to each nail, followed by a layer of glitter polish. Gradate the glitter polish from light to dark, finishing off with a top coat of clear polish.
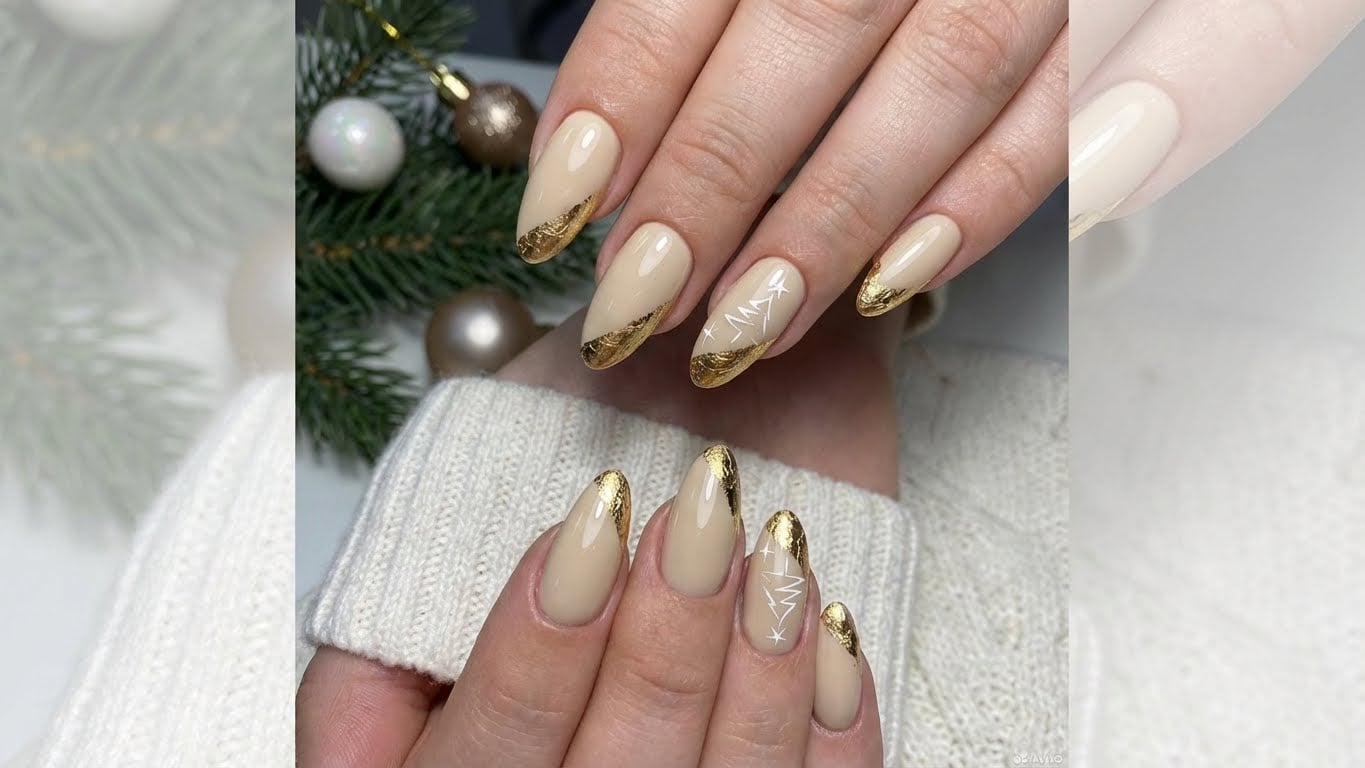
4. Metallic Nails
Get ready to shine with these metallic nails that feature a metallic finish. This design is perfect for those who want a nail that’s a little more edgy and avant-garde. Simply apply a metallic polish to each nail and finish off with a top coat of clear polish.
Metallic Nail Tutorial:
For this design, you’ll need a metallic polish and a clear top coat. Start by applying a base coat to each nail, followed by a layer of metallic polish. Finish off with a top coat of clear polish and you’ve got a metallic nail that’s sure to shine.
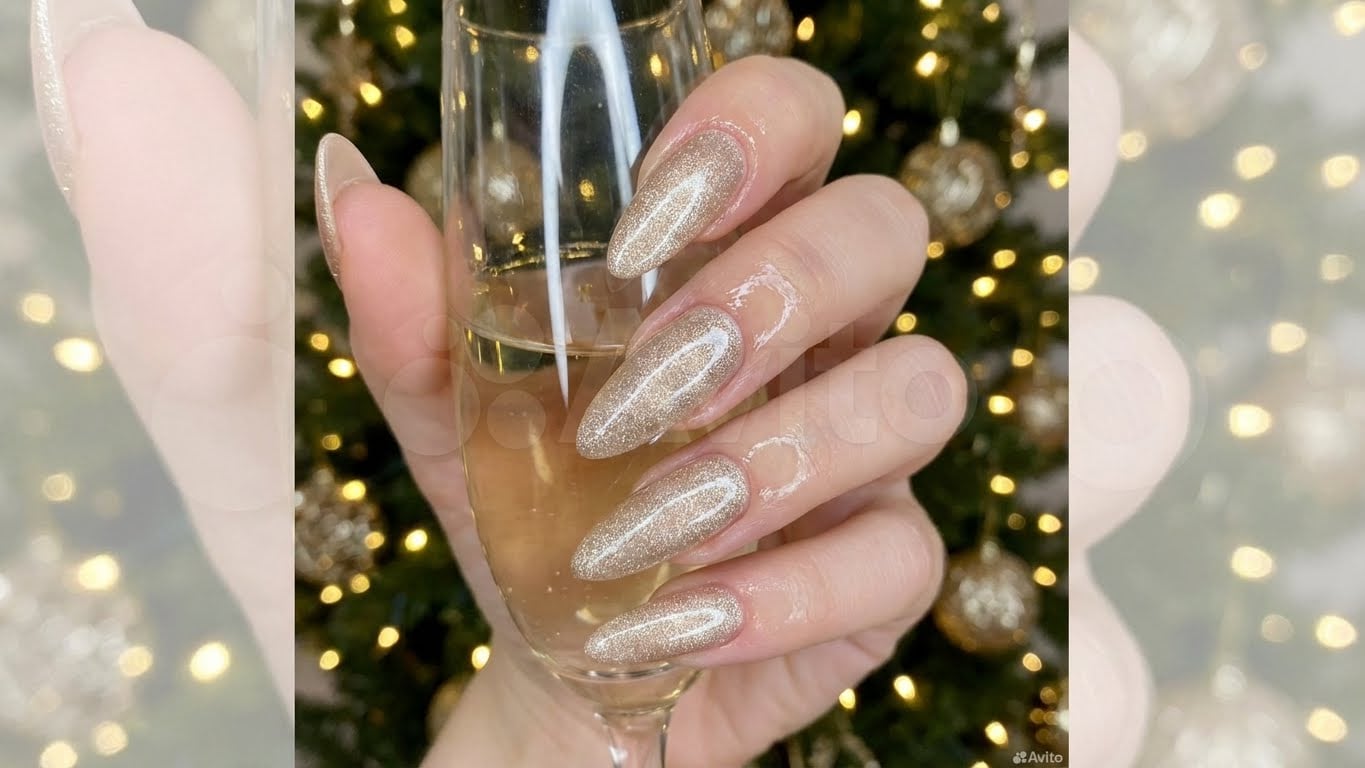
5. Glitter Nail Art
Get creative with this glitter nail art design that features a unique design. This design is perfect for those who want a nail that’s a little more unique and eye-catching. Simply apply a layer of glitter polish to each nail, creating a unique design.
Glitter Nail Art Tutorial:
For this design, you’ll need a clear base coat, a glitter polish, and a clear top coat. Start by applying a base coat to each nail, followed by a layer of glitter polish. Create a unique design, finishing off with a top coat of clear polish.
6. Holographic Glitter Nails
Take your nail art to the next level with these holographic glitter nails that feature a holographic finish and glitter polish. This design is perfect for those who want a nail that shines and sparkles without being too over-the-top. Simply apply a holographic polish to each nail, followed by a layer of glitter polish.
Holographic Glitter Nail Tutorial:
For this design, you’ll need a holographic polish, a glitter polish, and a clear top coat. Start by applying a base coat to each nail, followed by a layer of holographic polish. Finish off with a layer of glitter polish and a top coat of clear polish.
7. Glitter Striped Nails
Get creative with this glitter striped nail design that features a striped pattern. This design is perfect for those who want a nail that’s a little more unique and eye-catching. Simply apply a layer of glitter polish to each nail, creating a striped pattern.
Glitter Striped Nail Tutorial:
For this design, you’ll need a clear base coat, a glitter polish, and a clear top coat. Start by applying a base coat to each nail, followed by a layer of glitter polish. Create a striped pattern, finishing off with a top coat of clear polish.
8. Holographic Accent Nails
Take your nail art to the next level with these holographic accent nails that feature a holographic finish on one or two nails. This design is perfect for those who want a nail that shines and sparkles without being too over-the-top. Simply apply a holographic polish to one or two nails, finishing off with a top coat of clear polish.
Holographic Accent Nail Tutorial:
For this design, you’ll need a holographic polish and a clear top coat. Start by applying a base coat to each nail, followed by a layer of holographic polish on one or two nails. Finish off with a top coat of clear polish.
9. Glitter Gradient Nails
Get creative with this glitter gradient nail design that features a gradient of glitter polish. This design is perfect for those who want a nail that’s a little more unique and eye-catching. Simply apply a layer of glitter polish to each nail, gradating from light to dark.
Glitter Gradient Nail Tutorial:
For this design, you’ll need a clear base coat, a glitter polish, and a clear top coat. Start by applying a base coat to each nail, followed by a layer of glitter polish. Gradate the glitter polish from light to dark, finishing off with a top coat of clear polish.
10. Metallic Accent Nails
Get ready to shine with these metallic accent nails that feature a metallic finish on one or two nails. This design is perfect for those who want a nail that’s a little more edgy and avant-garde. Simply apply a metallic polish to one or two nails, finishing off with a top coat of clear polish.
Metallic Accent Nail Tutorial:
For this design, you’ll need a metallic polish and a clear top coat. Start by applying a base coat to each nail, followed by a layer of metallic polish on one or two nails. Finish off with a top coat of clear polish.
11. Glitter Nail Tips
Get creative with this glitter nail tip design that features a glitter polish on the tips of the nails. This design is perfect for those who want a nail that’s a little more unique and eye-catching. Simply apply a layer of glitter polish to the tips of the nails, finishing off with a top coat of clear polish.
Glitter Nail Tip Tutorial:
For this design, you’ll need a clear base coat, a glitter polish, and a clear top coat. Start by applying a base coat to each nail, followed by a layer of glitter polish on the tips of the nails. Finish off with a top coat of clear polish.
12. Holographic Nail Tips
Take your nail art to the next level with these holographic nail tips that feature a holographic finish on the tips of the nails. This design is perfect for those who want a nail that shines and sparkles without being too over-the-top. Simply apply a holographic polish to the tips of the nails, finishing off with a top coat of clear polish.
Holographic Nail Tip Tutorial:
For this design, you’ll need a holographic polish and a clear top coat. Start by applying a base coat to each nail, followed by a layer of holographic polish on the tips of the nails. Finish off with a top coat of clear polish.
13. Glitter Accent Nails
Get creative with this glitter accent nail design that features a glitter polish on one or two nails. This design is perfect for those who want a nail that’s a little more unique and eye-catching. Simply apply a layer of glitter polish to one or two nails, finishing off with a top coat of clear polish.
Glitter Accent Nail Tutorial:
For this design, you’ll need a clear base coat, a glitter polish, and a clear top coat. Start by applying a base coat to each nail, followed by a layer of glitter polish on one or two nails. Finish off with a top coat of clear polish.
14. Metallic Nail Accents
Get ready to shine with these metallic nail accents that feature a metallic finish on one or two nails. This design is perfect for those who want a nail that’s a little more edgy and avant-garde. Simply apply a metallic polish to one or two nails, finishing off with a top coat of clear polish.
Metallic Nail Accent Tutorial:
For this design, you’ll need a metallic polish and a clear top coat. Start by applying a base coat to each nail, followed by a layer of metallic polish on one or two nails. Finish off with a top coat of clear polish.
15. Glitter Nail Art with Rhinestones
Get creative with this glitter nail art design that features rhinestones and a glitter polish. This design is perfect for those who want a nail that’s a little more unique and eye-catching. Simply apply a layer of glitter polish to each nail, followed by a rhinestone on top.
Glitter Nail Art with Rhinestones Tutorial:
For this design, you’ll need a clear base coat, a glitter polish, and rhinestones. Start by applying a base coat to each nail, followed by a layer of glitter polish. Add a rhinestone on top of each nail and finish off with a top coat of clear polish.
Related Posts