A Guide to Creating Stunning Gold Christmas Nails
Christmas is a time for celebration, gift-giving, and festivities. One way to get into the holiday spirit is by adding a touch of luxury and sparkle to your look, and what better way to do that than with gold Christmas nails?

Why Gold Christmas Nails?
Gold is a versatile and timeless color that can add a touch of sophistication and glamour to any look. It’s perfect for the holiday season, as it evokes feelings of luxury, celebration, and joy. Plus, it pairs well with a variety of nail art designs and can be dressed up or down depending on your style.
Materials Needed
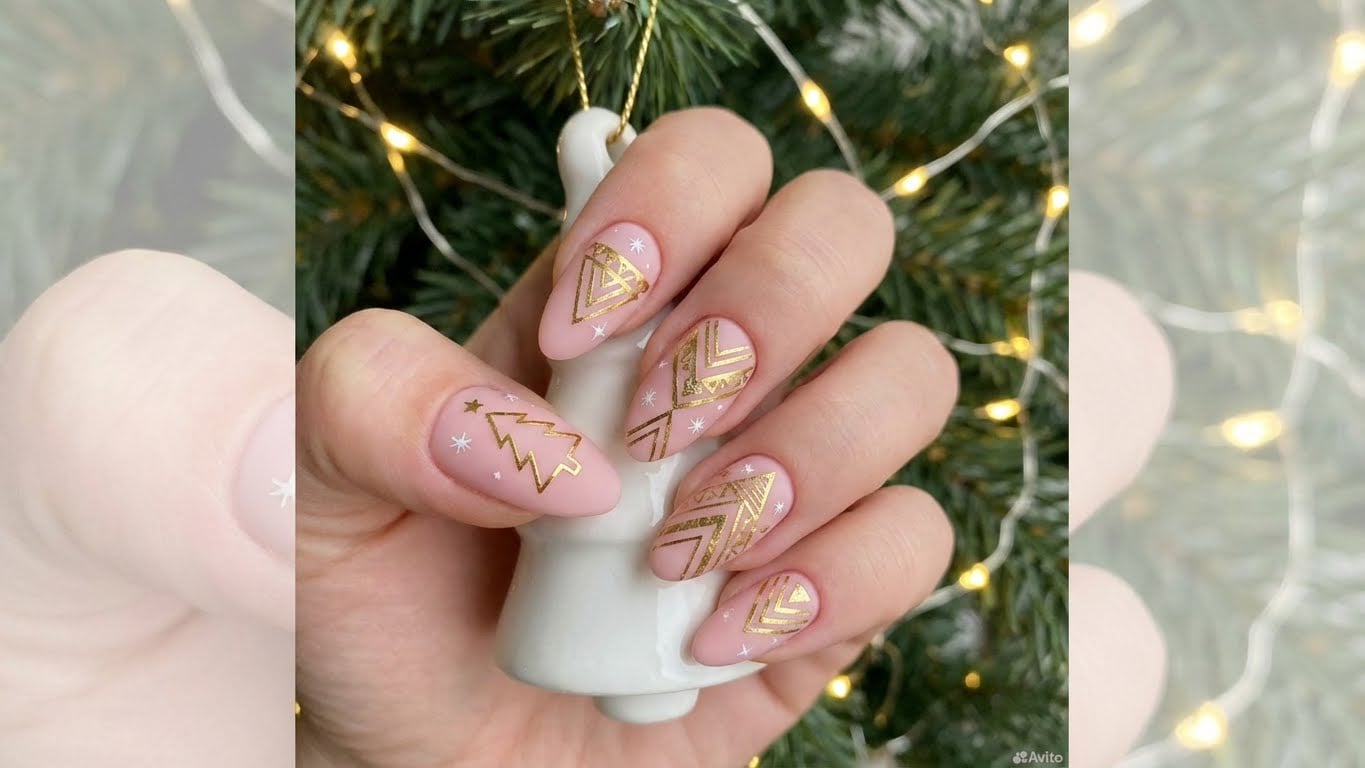
To create stunning gold Christmas nails, you’ll need the following materials:
- Base coat
- Nail polish in a gold or champagne color
- Nail art brushes
- Nail art paints (optional)
- Nail glue
- Nail tips (optional)
- Top coat
Step 1: Prep Your Nails
Before you start creating your gold Christmas nails, you’ll need to prep your nails. Remove any old nail polish and push back your cuticles. Apply a base coat to protect your nails and promote healthy growth.
Step 2: Apply Gold Nail Polish
Next, apply a gold or champagne-colored nail polish to each of your nails. Make sure to cover the entire nail surface, but don’t overdo it – you want a smooth, even finish.
Using a Nail Art Brush to Create a Gold Leaf Design
For a more intricate look, you can use a nail art brush to create a gold leaf design on top of your gold nail polish. Dip the brush in gold paint and use it to create a delicate, lacy pattern on your nail. You can also use a nail art stamp to create a more uniform design.
Step 3: Add a Gold Accent
To add a touch of extra glamour to your gold Christmas nails, you can add a gold accent. This can be a small gold dot, a gold stripe, or even a gold snowflake. Use a small nail art brush to apply the gold paint to your nail, and make sure to clean up any excess paint around the edges.
Step 4: Add a Clear Top Coat
Finally, apply a clear top coat to seal in your design and add shine to your nails. This will help your gold Christmas nails last longer and look their best.
Additional Tips and Ideas
Here are a few additional tips and ideas to help you create stunning gold Christmas nails:
- Use a gold glitter top coat to add extra sparkle to your nails.
- Try using a different shape or length of nail tip to create a more dramatic look.
- Experiment with different gold shades and combinations to find the perfect look for you.
- Don’t be afraid to get creative and try new things – after all, it’s the holiday season!
Common Questions About Gold Christmas Nails
FAQs
- {“q”: “How do I remove gold nail polish?”, “a”: “To remove gold nail polish, use a nail polish remover and gently scrape off the polish with a cuticle pusher. Be careful not to scratch your nails.”}
- {“q”: “Can I use a gold glitter polish instead of a gold nail polish?”, “a”: “Yes, you can use a gold glitter polish instead of a gold nail polish. However, keep in mind that glitter polish can be more difficult to work with and may not last as long.”}
- {“q”: “How do I prevent gold nail polish from chipping?”, “a”: “To prevent gold nail polish from chipping, apply a clear top coat and make sure to clean up any excess polish around the edges of your nails.”}
- {“q”: “Can I use gold nail polish on acrylic nails?”, “a”: “Yes, you can use gold nail polish on acrylic nails. However, make sure to apply a base coat and top coat to protect your nails and promote healthy growth.”}
Conclusion
Creating stunning gold Christmas nails is easier than you think. With a few simple steps and some basic materials, you can add a touch of luxury and sparkle to your holiday look. Don’t be afraid to get creative and try new things – after all, it’s the holiday season!
Related Posts