
Introduction to Glitter Holiday Nails
The holiday season is a time for sparkle, shine, and celebrating with loved ones. One of the easiest and most effective ways to get into the holiday spirit is with a glitter holiday nail design. Whether you’re attending a festive party, exchanging gifts with friends and family, or simply want to add some extra sparkle to your daily routine, glitter holiday nails are the perfect way to shine.
Choosing the Right Glitter
When it comes to glitter holiday nails, the type of glitter you choose can make all the difference. There are many different types of glitter available, including:
* Fine glitter: This type of glitter is perfect for creating a subtle, shimmery effect. It’s great for those who want a little bit of sparkle without going over the top.
* Medium glitter: This type of glitter is a great all-around choice. It’s not too subtle, but not too over-the-top either. It’s perfect for creating a bold, eye-catching design.
* Chunky glitter: This type of glitter is perfect for those who want to make a statement. It’s great for creating a bold, eye-catching design that’s sure to turn heads.
How to Apply Glitter to Your Nails
Applying glitter to your nails can seem intimidating, but it’s actually quite easy. Here’s a step-by-step guide on how to apply glitter to your nails:
1. Prep your nails: Before applying glitter, make sure your nails are clean and dry. Remove any old nail polish and push back your cuticles.
2. Apply a base coat: Apply a clear base coat to your nails to help the glitter adhere.
3. Apply glitter polish: Apply a thin layer of glitter polish to your nails. You can use a glitter polish that’s specifically designed for nails, or you can use a clear top coat with glitter in it.
4. Tap off excess glitter: Use a lint-free wipe or a cotton swab to tap off any excess glitter from your nails.
5. Apply a top coat: Apply a clear top coat to seal in the glitter and add shine.
Glitter Holiday Nail Designs
If you’re feeling creative, you can try out one of these glitter holiday nail designs:
* Glitter snowflakes: Use a small brush to paint on glitter snowflakes onto your nails.
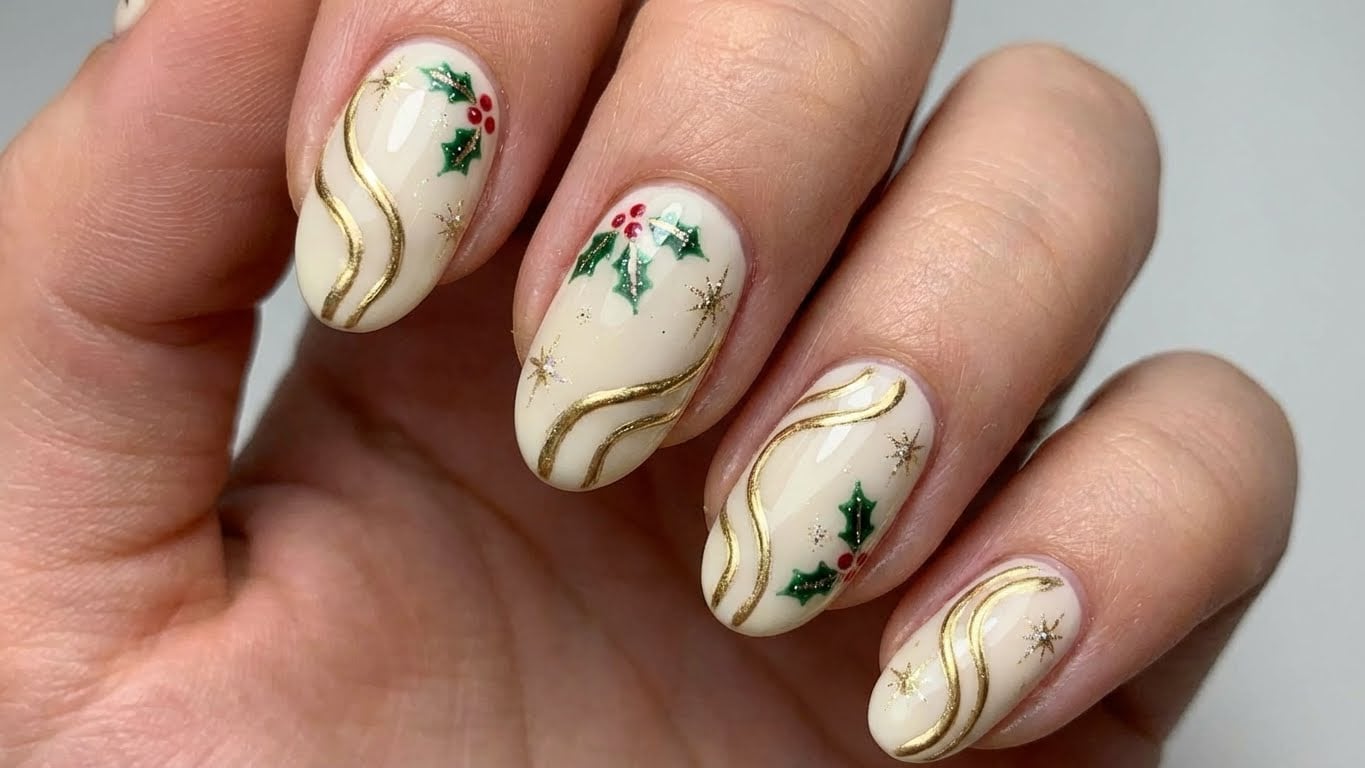
* Glitter holly: Use a small brush to paint on glitter holly leaves and berries onto your nails.
* Glitter snowmen: Use a small brush to paint on glitter snowmen onto your nails.
* Glitter trees: Use a small brush to paint on glitter trees onto your nails.
DIY Glitter Nail Stickers
If you’re not feeling confident in your nail art skills, you can try out DIY glitter nail stickers. Here’s a step-by-step guide on how to make your own glitter nail stickers:
1. Gather materials: You’ll need a sheet of nail stickers, some glitter, and a clear top coat.
2. Apply glitter to the stickers: Use a small brush to apply glitter to the stickers.
3. Seal with top coat: Apply a clear top coat to seal in the glitter and add shine.
4. Apply to nails: Apply the glitter nail stickers to your nails and seal with a clear top coat.
Removing Glitter Nail Polish</hassistant
{
“title”: “Glitter Holiday Nails: A Step-by-Step Guide to Sparkling Beauty
Related Posts


